Is it going to affect my typing speed? How long is it going to take to adapt to the split design? Will I ever adapt to it? Those are usual questions while considering buying an ergonomic keyboard.
When trying something new, it usually takes some time to master it. Ergonomic keyboards are no different, and there's an adaptation process. However, thanks to this guide, you'll learn how to use an ergonomic keyboard in no time.
Step 1: Clear your desk
Overall, an ergonomic keyboard does not use more space than a conventional keyboard. In fact, it's smaller, but it utilizes that space in a different way.
A clutter-free desk will allow you to move it around, trying different angles and positions without anything getting in the way. Plus, it looks nicer.

Step 2: Get comfortable
The first thing you have to do is easy: get comfortable. You don't need to rush to a completely split position or extreme tilting. Just focus on having your wrist aligned with your forearms.
- Test different angles and separations until you find one that feels natural, relaxed.
- Don't worry if it doesn't feel perfect right now. You'll instinctively be adjusting your positions over the next few days.

Once your hands are comfortably resting on the keyboard, it's time to focus on the elbows. You want to consider two things:
- The height, which should be slightly above the keyboard.
- And the support; For a while, you can leave your elbows hanging. But for extended periods it doesn't feel comfortable. Try raising the chair's arms to lean your elbows on them or use a thin cushion on the table.
Finally, pay attention to your back.
- You want to keep it straight at all times, which should be much easier thanks to the new position of your hands, arms and shoulders.
Step 3: Unleash the thumbs

The thumbs are our strongest fingers, yet we use both of them to push a single, enormous spacebar.
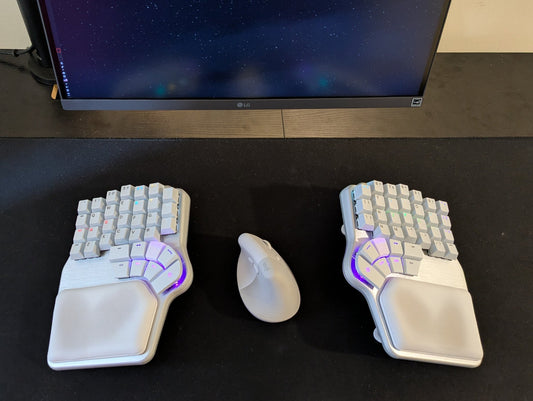
Most ergonomic keyboards have some weird extra keys near the thumbs. Sometimes the space bar is just split in two or four. Others have large clusters of keys that resemble the console of a spaceship.
The reason behind these keys is favoring the use of the thumb instead of the pinkie. It makes much more sense to use your strongest finger to push keys comfortably placed near it, rather than stretching your weakest finger to reach remote keys.
A great way to start is to use your configurator software to move the Backspace to one of the thumbkeys and leave the original key with no function. That way, you'll force yourself to get used to the new placement of the Backspace.

Once you are used to one key, move on to the next one, or even better, try two. In a few weeks, you'll find yourself typing with no effort with a custom thumb cluster.
Step 4: Start using layers
One of the things that most ergonomic keyboards have in common is that they are smaller than conventional keyboards. They are missing keys like the number pad, the arrows, or the F keys.
This is completely on purpose. The goal is to keep your fingers as close to the home row as possible, reducing hand movement and finger stretching.
But, where have those keys gone? Well, they are in a different layer.
This might seem odd, but you're already using layers on your conventional keyboard. For instance: holding the Shift key takes you to a layer where all your letters are capitalized and you can access different symbols than in your regular layer.

A fully programmable ergonomic keyboard uses the same principle but turns it up to the max with several customizable layers.
- Start by creating a layer with all those missing keys. You'll also have to configure a key to access that layer: think of it as a second shift.
- Once you're used to that layer, maybe you can create a second one with your favorite shortcuts or your most used symbols.
Getting used to layers is key for better ergonomics, but it takes some time. Start simple, and soon you'll find yourself customizing your layouts like a pro.
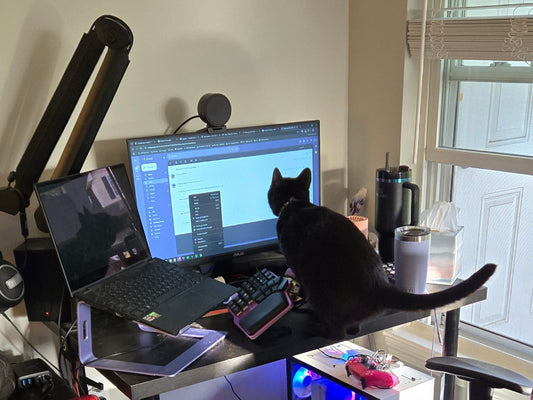
Step 5: Rearrange your peripherals

Usually, the more you get used to these keyboards, the wider apart you keep the halves. That leaves a new, unused space between them that you can explore:
- Try placing your mouse there. It will help you save a lot of hand movement.
- If you prefer it, you can also place a cup of coffee, a drawing tablet, a notepad, or even your pet.
How long does it take to learn how to use an ergonomic keyboard?
If you follow these five steps, you'll find yourself properly using your ergonomic keyboard in no time.
However, the key is not to rush yourself.
Adapting might take longer for some people. For example, touch typists go through this process much faster, so it might be a good time to give it a go.
But, if you put in some effort, in about two weeks you'll have reduced your hand movement and significantly improved your posture without even realizing it.