So you've just received your Dygma Raise 2 and are eager to try your new keyboard immediately. However, when you open the travel case and see a bunch of cables and a tiny USB hub with three ports, you might feel a bit confused.
But don't worry—we're here to help you set up your Dygma Raise 2 and get you up and running in no time.
Unboxing Your Dygma Raise 2
Inside the box, you’ll find:
- The keyboard halves
- A USB hub called the Neuron
- Multiple cables for different configurations
- A USB-C to USB-A adapter
Ensure you identify each cable correctly. The Neuron is key to both wired and wireless functionality.

Setting Up Your Keyboard
Let’s start with the basics. These steps will get you started whether you have the wired or wireless version.
Connecting the Neuron
The Neuron is the brain of your keyboard. Here’s how to connect it:
- Use the 5-foot (150 cm) A-to-C cable to link the Neuron to your computer. The included50 cm option works too if you prefer a shorter cable.
- No USB-C port? No problem! Use the C-to-A adapter included in the box.
- Always plug the cable into the single port on the Neuron for proper functionality.

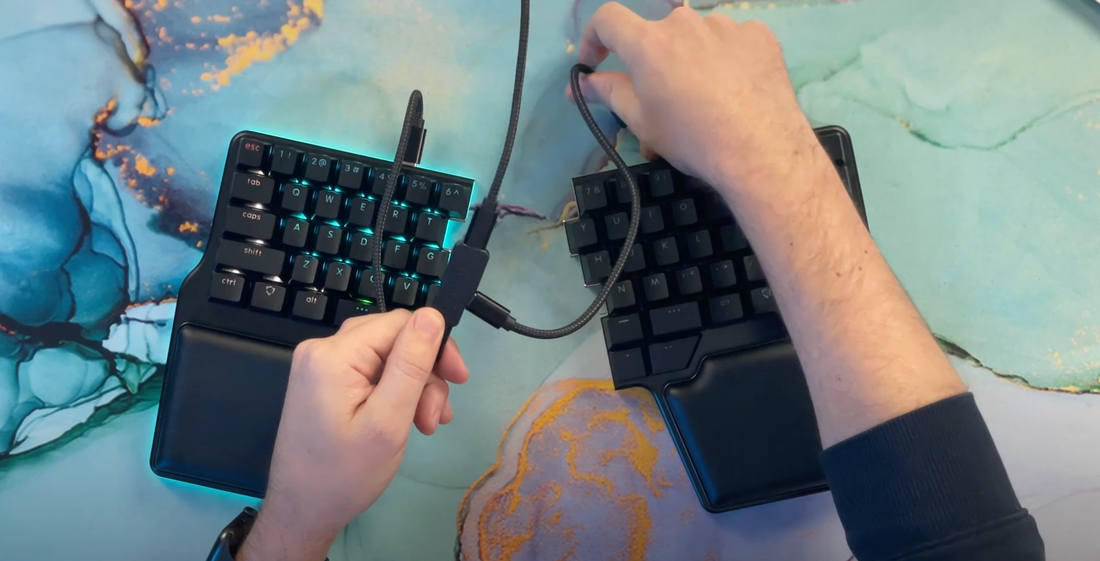
Connecting the Keyboard Halves
- Use the 30 cm cables to connect each keyboard half to the Neuron.
- For more flexibility, you can use the 50 cm cable to connect the sides, but avoid the 150 cm cable, which is meant only for the Neuron-computer connection.
If you’re using the wireless version, switch off the keyboard halves in wired mode for better performance. Once connected, your keyboard will light up, signaling it’s ready to use.

Wireless Connectivity
The Dygma Raise 2 supports low-latency RF mode and Bluetooth, making it a versatile option for wireless use.
Low-Latency RF Mode
- Keep the Neuron connected to your computer as in wired mode.
- Disconnect the cables from the keyboard halves and switch them on.
- Your keyboard will automatically switch to RF mode for seamless, lag-free wireless performance.

Bluetooth Mode
- Place the Neuron into the slot beneath the left half of the keyboard.
- Switch on both keyboard halves. The LEDs will pulse blue, indicating Bluetooth pairing mode.
- Select the Dygma Raise 2 from the list of available Bluetooth devices.
- Enter the pairing code displayed on your screen using the numbers. If you have superkeys of number pad numbers, this may not work. To avoid problems, use basic numbers for this.

You can pair the keyboard with up to five devices.
In Bluetooth pairing mode, you'll see different colors. Green indicates which channel is active; white points to already assigned channels; blue is the available channels, and if you hold red, you can delete paired channels.
You can switch between devices by pressing the Bluetooth pairing button.
It is on Layer 3 under the C key on the default layers.

Battery Management
The Dygma Raise 2 is powered by two 2370mAh batteries, providing a combined capacity of 4740mAh. Battery life depends on too many things, but you can make it longer by adjusting the LED brightness:
- Full brightness: It can last 20 hours
- 30% brightness: It can last 3–4 days
- No LEDs: It can last a longer duration.
Charging Your Keyboard
There are two ways of charging your keyboard.
- With the computer: Connect the Neuron to your computer and the halves to the neuron. Make sure the wireless toggle is off.
- Direct charging: Use a low-wattage phone charger (max 10W). Ensure the keyboard halves are turned off when charging directly, and avoid fast chargers or high-voltage USB hubs, which may damage the keyboard.

Checking Battery Levels
Press the battery indicator key (In default layer: Layer 3 under V) to view the battery status.
Then, you'll see LED indicators on the inner row of each half.
- 1 red light: Means less than 10% of battery.
- 1 green light: Means between 10–40% of battery.
- 2 green lights: Means between 40–70% of the battery is charged.
- 3 green lights: Means more than 70% of the battery is charged.
The LEDs blink when the keyboard is charging, and they remain static once it is fully charged.

Firmware Updates and Configuration
Before diving into customization, ensure your keyboard is running the latest firmware.
To update to the latest Firmware, follow these steps:
- Download Bazecore from dygma.com/bazecore.
- Open Bazecore and select your keyboard from the Keyboard Manager. If it doesn't appear, select Scan Keyboards.
- Go to Firmware update, select the latest version, and follow the on-screen instructions.
If the update gets stuck for over two minutes, close Bazecore, reconnect the keyboard and try again.

Restoring Backups
During firmware updates, your last backup is automatically restored. If this fails, your keyboard may revert to a basic factory layout. To restore your configuration:
- Go to Preferences → Backups → Restore Backup from File.
- Select your desired backup file to recover your custom setup.
If you need more help to update your firmware, visit our Firmware helper.

Personalizing Your Layout
Now that your keyboard is updated, it’s time to customize it!
Use Bazecore to remap keys, create layers, adjust lightning, create superkeys, and much more!
Check out this video to learn more about Bazecor.
Ergonomic tips
The split design of the Dygma Raise 2 allows you to adjust it for maximum comfort.
Start by placing the halves together and gradually increase the distance as you get used to the layout.
Finally, align the halves with your shoulders to reduce strain.
If your keyboard has tenting, remember to deploy the side legs for excellent stability. But for reverse tilt, fold the side legs to prevent wobble.
Also, adjust your chair height and elbow position to ensure your wrists stay below your elbows.

And that's basically it.
We hope you enjoy your new Dygma Raise 2 keyboard.
Share your thoughts on Reddit or Discord. See ya!! 💜