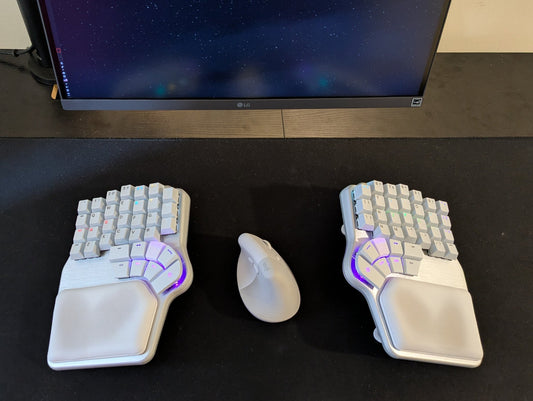
The Dygma Sonsei is a premium low-profile keyboard with an anodized aluminum body and double-shot PBT keycaps.
But there’s one part of its build quality you can’t see from the outside.
So, we’re going to take the whole thing apart.
And all we need are three tools: a keycap and switch puller, a screwdriver, and a plastic pry tool.
Removing the keycaps
Let’s start by removing the keycaps.
The Sonsei uses double-shot PBT keycaps, which give them their textured finish and ensure that the legends won’t wear off.

We also created a custom mold for the thumbkeys.
You can use standard 1u keycaps in the thumb cluster, but this custom shape makes it easier to glide your thumb across the entire cluster.

Removing the switches
Next up, let’s remove the switches.
After testing several low-profile switches and building prototypes with different options, we ultimately chose the Gateron KS-33 2.0 for its combination of feel, sound, and lighting.

The Sonsei is also hot-swappable.
So, if a switch ever fails or you want to try a different one, you don’t need to replace the keyboard. You don’t even need to open it.
 Just pull the switch out and replace it with a new one.

Once the switches are removed, you can get a better look at the Sonsei’s anodized aluminum body.

But the most interesting part is what’s underneath.
Open the keyboard
To open the keyboard, you only need to remove the 13 Philips M2 screws.

A PH0 tip works best for this task.

Notice that every screw is accessible. None of them is hidden underneath the rubber feet, as they often are on other electronics.
We actually designed cutouts in the feet specifically so you can access the screws without removing or damaging them.

Once the base comes off, you reach the first of several precisely cut sound-dampening layers.
These layers sit inside the keyboard underneath the main components.

The replaceable battery
Underneath the first sound-dampening layer, you’ll find the 2000 mAh battery and the main PCB.

The battery isn’t soldered to the PCB.
Instead, it’s connected using a removable connector and held in place with light double-sided tape.
That means replacing it is simply a matter of:
1. Unplugging the connector.

2. Gently prying the battery out.
 3. Installing the new one.
 You wouldn’t even need to remove the switches or keycaps to replace the battery.
You only need to go that far if you’re replacing the PCB.
Replace the PCB

Even replacing the PCB is straightforward. It only requires removing eight more screws.
Once those screws are out, you can simply lift the PCB out of the keyboard.
Underneath the PCB, you’ll find two final sound-dampening layers.

They’re precisely cut to cover as much area as possible inside the keyboard.
And with those removed, that’s the entire Sonsei.

A keyboard designed to be taken apart
No destructive disassembly. Nothing is glued shut. No cutting wires. No desoldering components to remove them.
If something eventually wears out or breaks, we want you to be able to replace that part, not the whole keyboard.
And, more importantly, it goes back together, too.
Reassembly
Reassembly is simply the process in reverse. Once everything is back in place, there’s only one important test left. Turn the keyboard on, and the LEDs come on.

Build quality isn’t just about how long something survives.
It’s what happens when something eventually doesn’t.