Building a keyboard with both integrated tenting and reverse tilting is no joke.
That's why only 1 or 2 other split ergonomic keyboards have these components built in - and to be honest, none of them quite nail it.
So we accepted the challenge, and refused to settle until we developed the concept that both the Dygma Defy and the Raise 2 use today: the integrated tenting with reverse tilting.
Why add tenting in the first place?
At Dygma, our goal has always been to create the most ergonomic computer peripherals. When working with regular keyboards, your hands and wrist are placed in an irregular position when typing. Those who spend long hours in this position can potentially end up suffering from numerous postural issues or health conditions.
By typing on a tented keyboard, you allow a more natural hand and wrist position, increasing comfort and the overall ergonomics of your working setup.
We dive deep into the history of tenting and its benefits in this video, so check that out if you're interested:
The beginnings: the OG Raise and the tenting kit
We always promised follow-up components when we launched the original Dygma Raise in 2017, such as an add-on tenting kit.
Why didn't we integrate the tenting in the first place?
Well, in the beginning, we didn't actually think people wanted the tenting. And since the underglow took up all the space on the underside of the OG Raise, we couldn't just easily integrate it.

So, after six different concepts, we finally reached the final design.
And to great success, it sold like hotcakes! Our estimated 50 interested buyers turned into thousands.
But this add-on tenting kit wasn't perfect: because we couldn't integrate the tenting, it added 1 centimeter heigh to the OG Raise.

And we must mention it was too heavy -being a metal plate you had to attach, it weighed down the OG Raise by an extra 500g. We know some of our customers liked this because it made the keyboard feel more secure on the table, but let's be honest, it was a bit of a tank.
Then, of course, the angles were a little limited, too. It only had four options: 10, 20, 30, and 40 degrees.
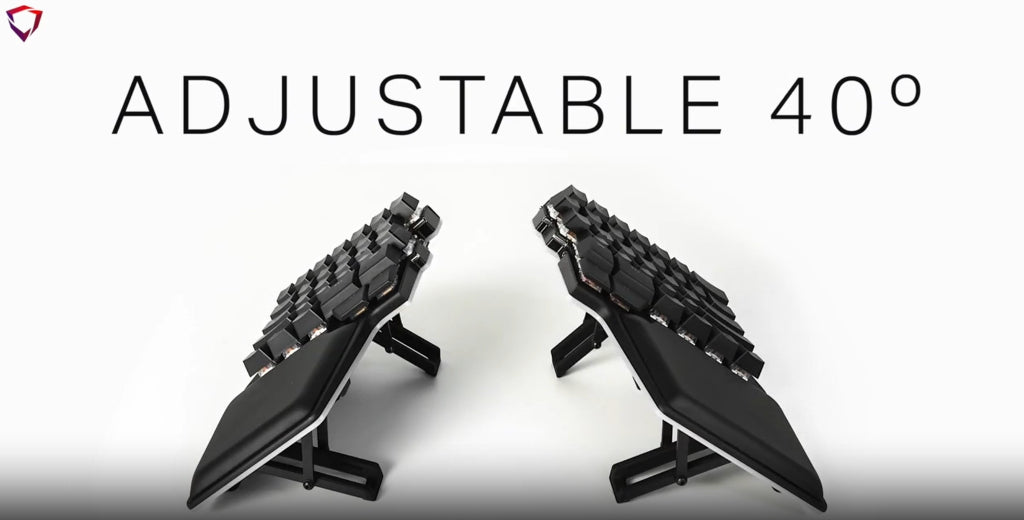
Not bad, but we wanted MORE.
Updated integrated tenting
So, when it came to developing the next tenting solution, we knew it needed to be integrated into the keyboard.
Additionally, we wanted to shoot for the moon and add reverse tilting, too, since this has always been an in-demand feature from the community.

And so, with these challenges in mind, we set the following goals: we wanted to make the best tenting kit out there.
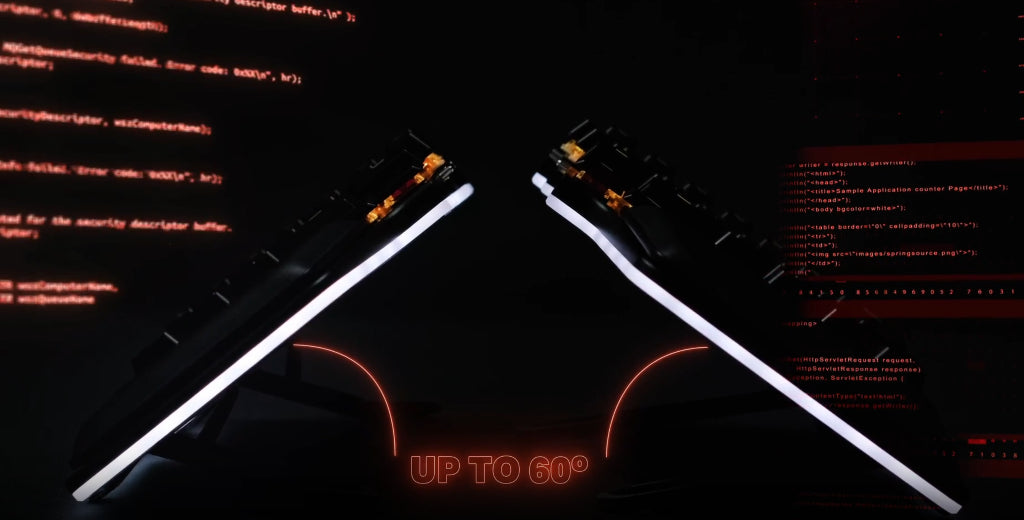
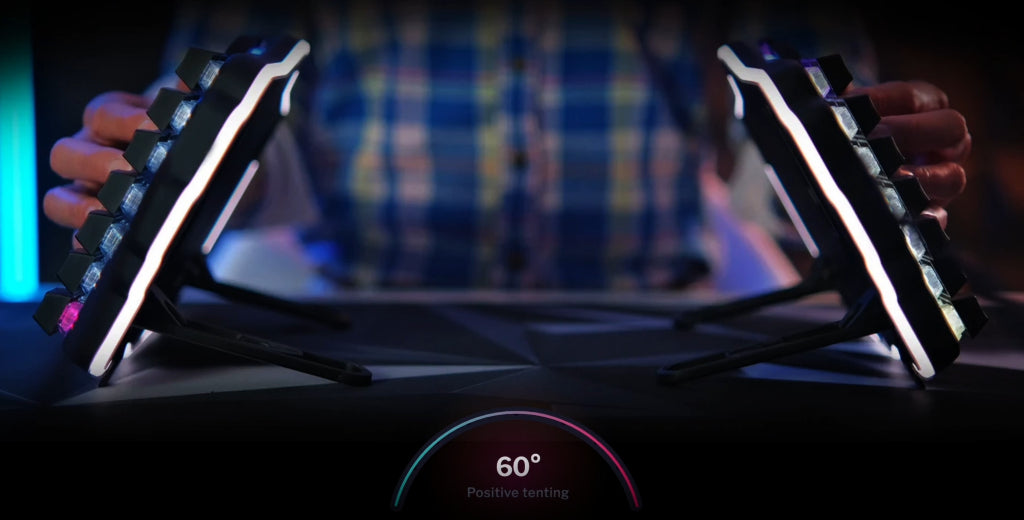
- We wanted more tenting angles, up to 60º, along with negative tilting angles.
- It needed to be visually pleasing and integrated into the keyboard.
- We wanted everything to be durable and stable, yet light.
- This was our stretch goal - to have tenting and reverse tilting at the same time.
To put it bluntly, we wanted to make the best tenting kit out there.
So, back to the drawing board, specifically José's drawing book! José is our awesome product designer.

We started by investigating the popular sliding concept.
This concept worked by using a free-flowing slider that can be locked into place by using a clamp. We really liked this idea because it allowed you to reach almost any tenting angle.
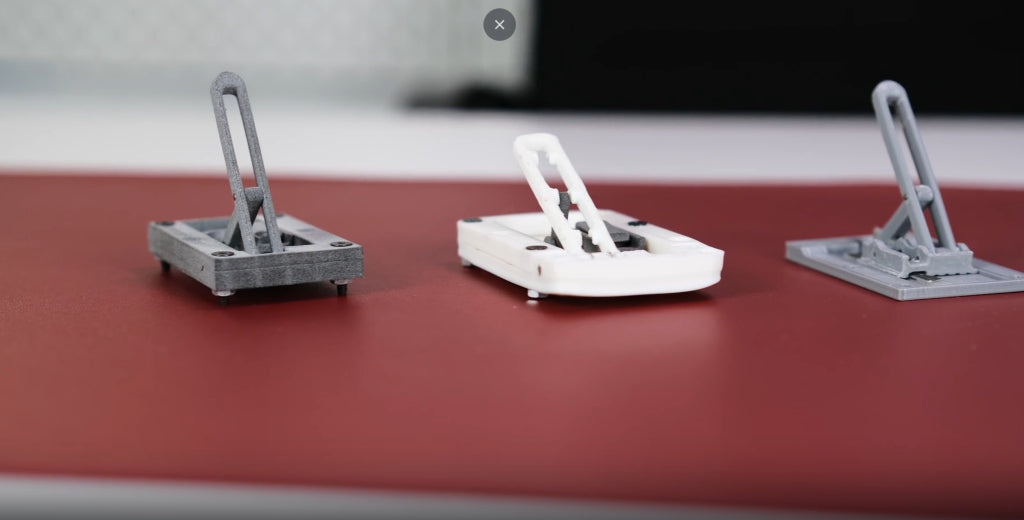
However, our problem with this design was that the clamping was never strong enough to hold the keyboard. Finding the correct position for the front and back tenting legs was difficult. If you didn't choose the right angles, your keyboard would wobble.
We explored other concepts, like a sliding mechanism found in the tenting leg, which could then be inserted in a fixed position on the keyboard.
But the problem we had here was that it just wasn't stable enough to hold the keyboard at high angles.
After deeply exploring the realm of these new concepts, we found our way back to our original concept featured on the OG Raise.
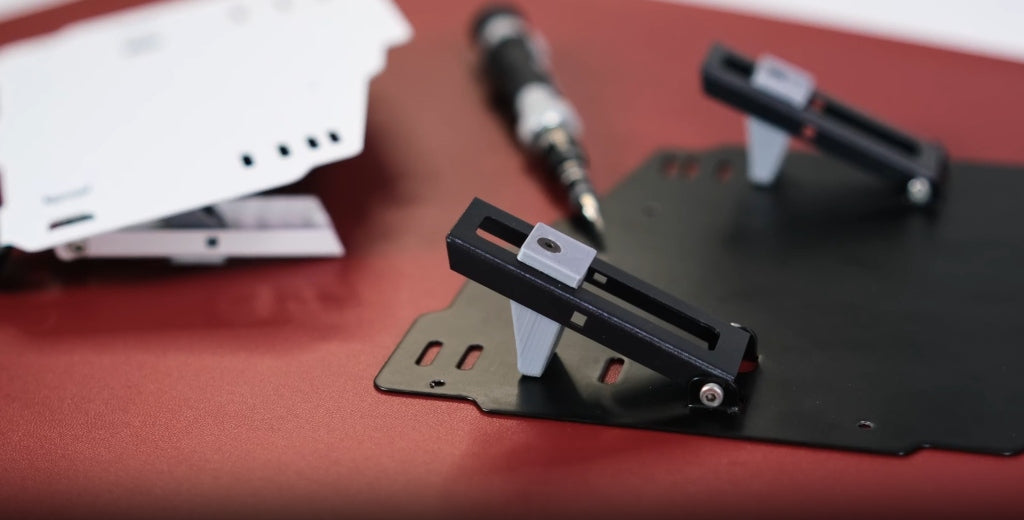
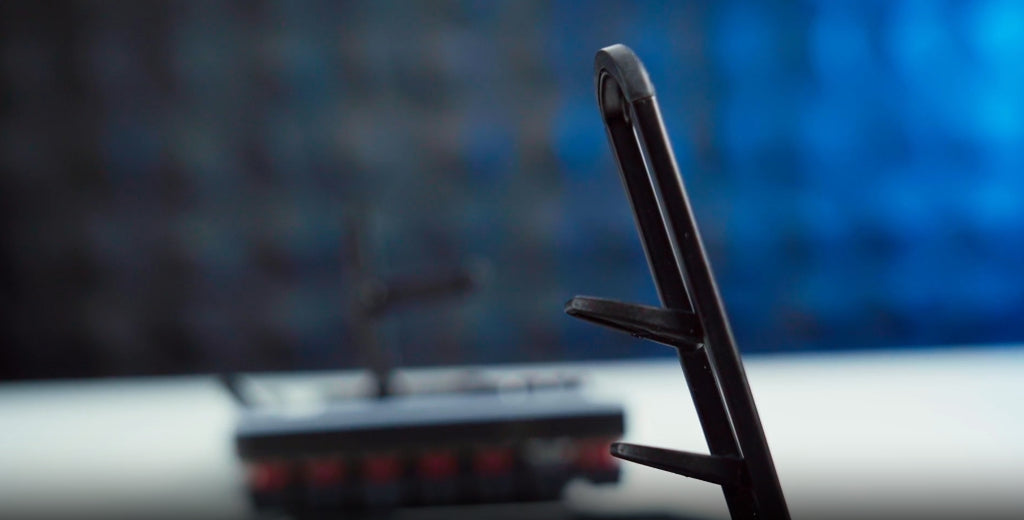
Using everything we've learned from the other designs and the original concept, we focused on further developing the original concept. But this time, instead of 1 rod on each tenting leg, we had 2.
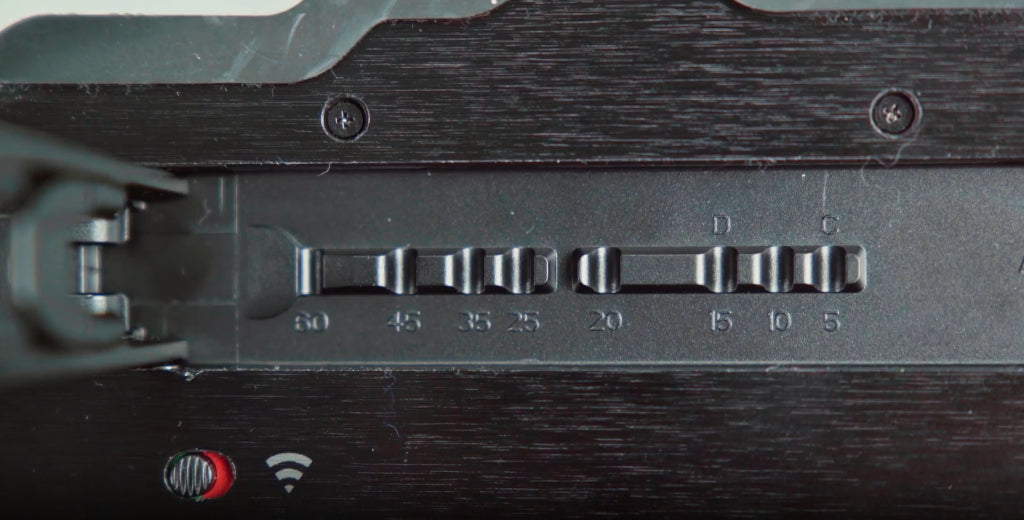
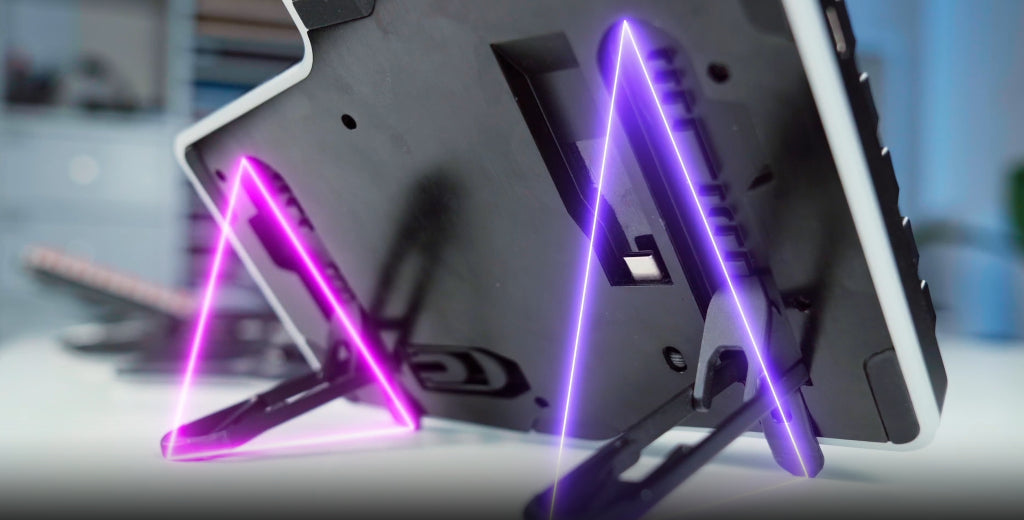
This enabled users to select from 0, 5, 10, 15, 20, 25, 35, 45, to 60º.
It was sturdy since the angle selector found in the keyboard's base acted as a blocker to hold the rod in place.
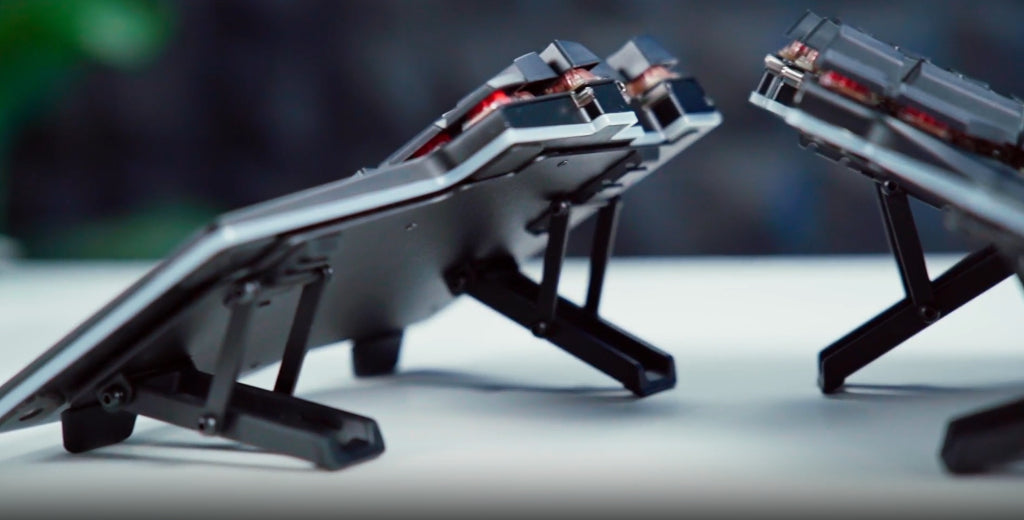
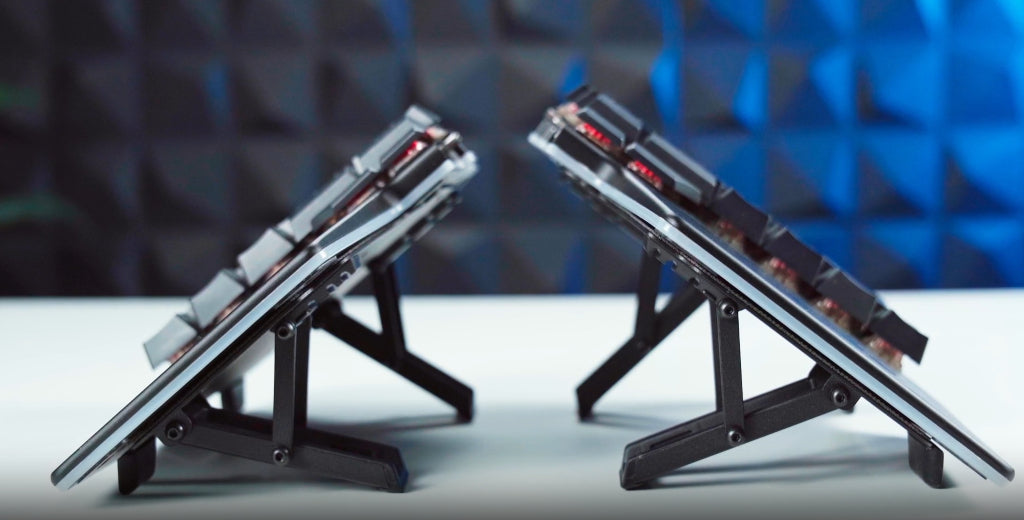
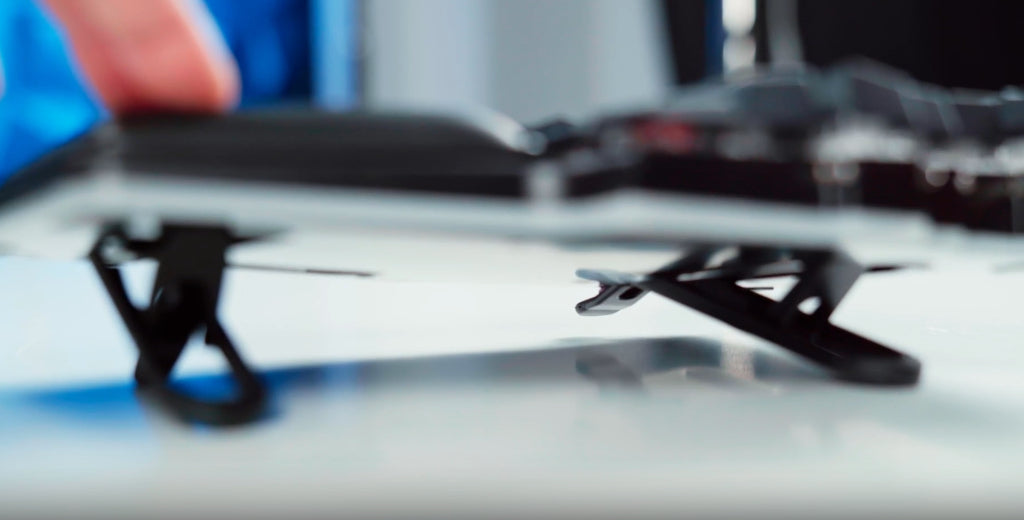
We implemented side legs to stabilize the keyboard when tenting or tilting is used.
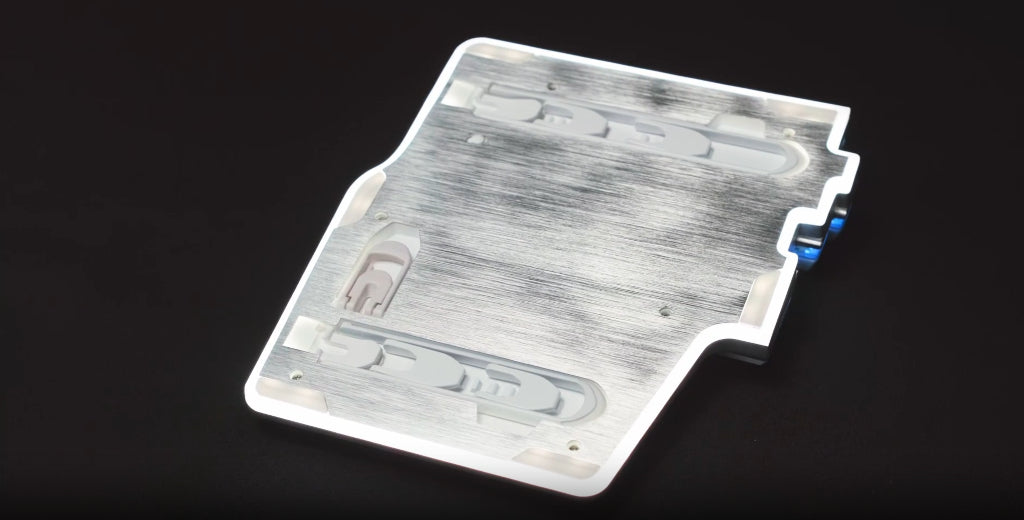
But more than that, we adapted the underside of the keyboard to ensure that the tenting and tilting legs can be integrated underneath. This meant completely changing the structure of the base and the PCB designs.
And this is exactly what we did with our columnar keyboard, the Dygma Defy.
We made a video about its development here:
Challenges with the current concept
But it wasn't all solved; we had another challenge ahead - implementing the same concept on the Raise 2.
Why can't we just take the Defy tenting and tilting legs and stick them on the Raise 2?
Well, it already worked, and the concept was reliable. It's like a triangle, and you simply create a different triangle every time.
But the problem was finding the correct calculation for all of them - for all of the different angles. Take a look at the Dygma Raise and check out its shape.
Can you see that each half isn't symmetrical?
This throws a whole new spanner into the works. If we were to just do with the Raise 2 what we did with the Defy, you'd have different heights for each half.
So, in order to create an even tenting level, we had to complete two different calculations and essentially build the same but different mechanism twice.
First, we calculated the height of the left side for every angle. Given the height of the left side, we then matched the right side's height and calculated the angle.
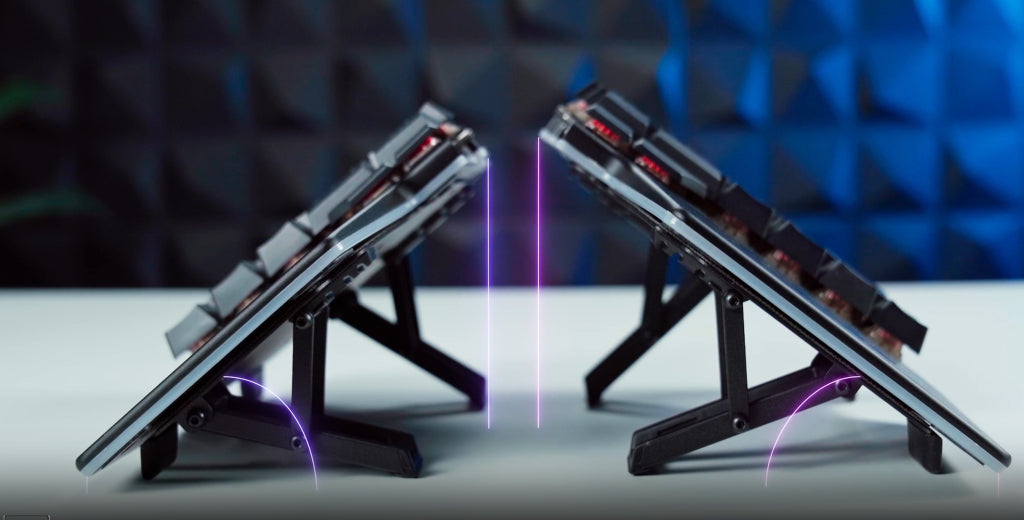
That way, both sides had the same height when the keyboard was tented, even though the angles were slightly different.
Was the difference noticeable? Well, we're talking about a millimeter or 2 of difference, so no. From our tests, there was no obvious feeling of the difference.
And what about a negative tilting?
Luckily, that was a bit easier. Since each half of the keyboard is the same length, we could use the same designs for both.
But, if we want to reach our stretch goal - which is having tenting and reverse tilting at the same time, that's when things get a bit messy.
Unfortunately, we weren't able to solve that one, so our fourth goal was a no-go.
Finally, it was time to tackle the third goal.
How to ensure stability & durability?
As we mentioned before, the previous tenting kit of the Raise was made of steel.
And although steel is really strong, it's also heavy.

So, we decided to go with a strong yet flexible metal, aluminum. Since it requires a lower temperature for melting, it's easier to mold into the shapes we want.
The tenting legs are made of aluminum. Then, the tenting rods are made of ABS plastic, and the side legs and reverse tilting legs are made of double-shot ABS plastic and rubber.
Since we are dealing with millimetric adjustments, inconsistencies can always be. But that's where the elasticity of the aluminum and the rubber feet comes into play.
Where are we now?
Right now, we are doing the Design Validation Test. We've given the designs to our suppliers so they can manufacture them and we can validate them.
We say suppliers because there are actually three factories that are responsible for the tenting/tilting components.
1. One supplier makes the aluminum tenting legs.
2. Another supplier makes the plastic tenting rods.
3. And a third supplier makes the side legs and reverse tilting legs, which are double-shot in plastic and rubber.
As you can imagine, it's a complicated process with many ups and downs; every little change can affect the different parts.
We're hoping that with the Design Validation units, we can make the necessary adjustments to ensure everything fits correctly.
Fingers crossed, all our calculations are correct, and if not, we'll be back to the drawing book.