Hello, everybody 👋
On our first manufacturing update a few weeks ago, we were very excited to have received the top panel for the Dygma Defy, and we were waiting for the base to assemble a full keyboard with all the manufacturing samples 🏭
Well, that base finally arrived 🎉
This was a massive milestone for us; we could start testing how all the components fit together and fine-tune them to reach the level of perfection we want to achieve.
So, in this week’s manufacturing update, we will go over many mechanical components and explain all the things we want to improve 🔬
Let’s go!
The keycaps

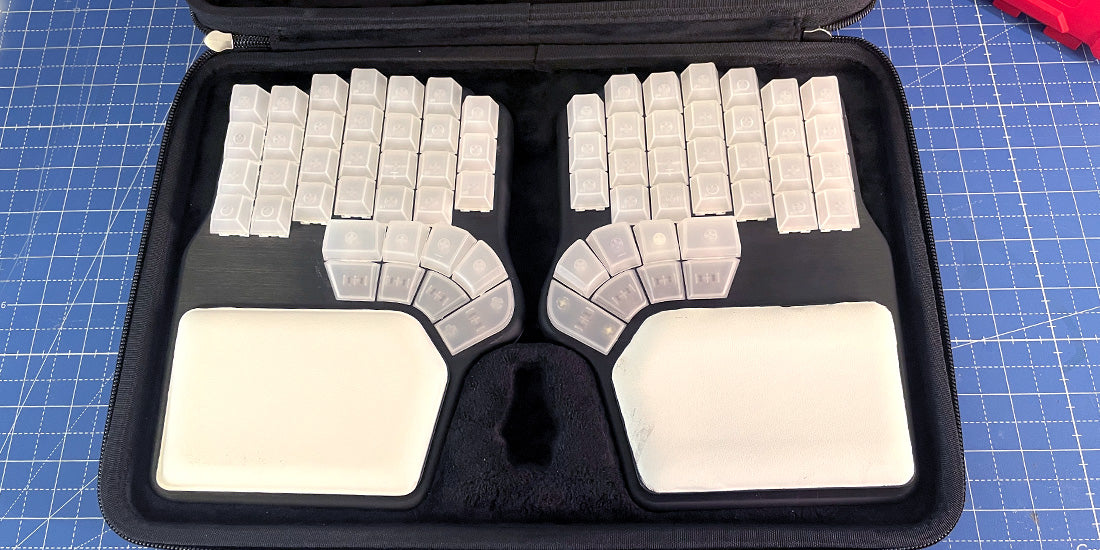
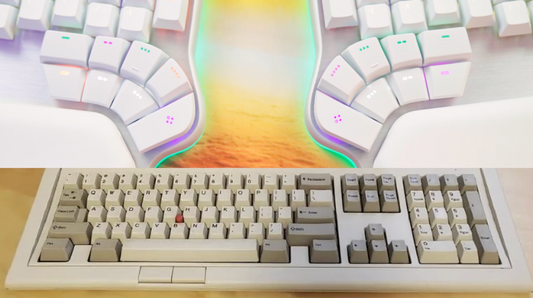
A new set of the Cherry profile ABS keycaps has arrived. They are not painted yet, but I must confess I wouldn’t mind having my keyboard like that. Imagine the light that would shine through 🌅
Overall, they look and feel pretty well, and we’re delighted with the change from OEM to Cherry profile.

This batch corrected some imperfections from the first sample: the previous version had issues with the stems that attach to the stabilizers, which didn’t clip correctly.
Remember that the Defy only has one stabilizer on each side, for the key at the “tip” of the thumb cluster.
In this new sample, we’ve found some imperfections related to the injection points or minor errors like the placement of the home keys’ bump, which is too low. But those are easy fixes 😊

Plus, the thumbkey still doesn’t clip perfectly with the stabilizer. The stem length is now correct, but the fitting is too loose 🤦
The top panel
Now that we’ve had the time to take a deep look into the top panel, we have found some things that we need to fix 🔧

To start with, the holes for the switches are ever so slightly tighter than we’d want, meaning the switches would need to be pulled with too much force, and we wouldn’t want you to scratch or damage your Defy accidentally 🙈
We’ve also found some issues with the clipping of the stabilizer. In this case, the holes are a bit too big, and the stabilizer stem goes through the top plate and gets stuck 🤦♀️

Plus, it seems to be hitting something on the base when you bottom out, making an annoying high-pitched sound, so we’ll have to rework that too. It’s “funny” how such a small and simple piece can give so many headaches 😂
We also found that the USB port was too close to the edge of the top plate, which means you could see the metal part of the USB cable when plugged in. Of course, in line with our ‘cut all the sharp corners’ policy, we’re making changes so it sits flush instead.

On top of that, the shape of the top plate doesn’t completely match the diffuser of the RGBW underglow, so the metal overhangs just a tiny bit in some places.
Both issues result from an imprecise top plate caused by an incorrect configuration of the parameters of the stamping machine. We are now working with our supplier and adjusting those parameters, so the following sample has the precise shape 🪛

Finally, we have strong opinions about the aesthetics of the Defy, and it turns out the texture of the brushed aluminum is a bit too scratchy; we’re looking to adjust this so it’s smoother to the touch 👇
The base
As we said, we were thrilled to receive the base, but all our joy turned into despair once we assembled it and noticed it was around half a millimeter thicker than in our 3D drawings –or 1/48 of an inch if you hate the decimal system 📏
The supplier decided to do so on their own because he wanted to ensure the plastic was distributed evenly throughout the mold. Of course, he didn’t think that it would affect the rest of the fitting 😅

As a result, you can see that the base is not entirely flush with the diffuser, which is not acceptable at all. Plus, the keyboard would be 0.5 mm higher, and we always wanted it to be as low as possible.
This has been quite a hiccup, and we’ve had to work back and forth with our supplier to fix it. Fortunately, a new base with this fixed is already on its way to our office 🛫
But that’s not the only improvement the base is going to have.

For example, we’re changing the copper screw inserts for black ones so they don’t stand out so much 🔩
We’ve also noticed that, although the rubber pads on the base look and feel great, if you look very closely, you can see the adhesive under them. We’ll hide that under the mylar, which is the film that covers the base.
And talking about the mylar, we also want to make some changes.
First of all, we have to change the Dygma Defy artwork because the fonts don’t have the correct weight 🔠

Second, we want to round all sharp corners of the base, especially around the hinges of the tenting legs. Silky smooth is the objective, so it feels great to the touch, and there’s no risk of peeling the mylar with time and use.
And now that we have mentioned the tenting legs, let’s dive into that 🎪
The tenting legs

For the tenting legs, it’s paramount that they are extremely sturdy and that the experience of unfolding them feels much like opening the lid of a Macbook 👩💻
Although us being us, we can’t forget about aesthetics.
One of the first things we noticed once we assembled the tenting legs was that they were slightly twisted; hence they popped out of the base in some cases. This wouldn’t impact the Defy being flat on the desk thanks to the rubber pads, but we can’t look away 🦉

We also didn’t like the feeling when moving the legs and rods, it felt too light and flimsy. So we changed the hinge mechanism on the base, and we will add a small silicone slip, so the leg is tucked into position when folded.
Plus, we are making millimetric adjustments to the size of the rods –that’s why you see tape on them; it’s from the tests 🧪

But that’s not all. After we changed the hinge mechanism and started doing resistance tests, we broke one of the legs! 😱
It was just the bit that goes into the hinge, and we broke it while trying to force it into position (it was one of the twisted legs). But even so, that’s not acceptable; we will use an even stronger aluminum alloy 💪
![]()
To top it off, the silicon rubber cap for the legs did not pass our quality tests. Under regular use, it stays put, but when we pulled as hard as we could, we tore it apart. So we’re now exploring different materials and solutions that can resist our strength🏋️♀️
On a less critical note, the texture surrounding the angle selector is not as nice as we’d like. Since the tenting leg will be folded and unfolded frequently in its lifetime, we want to ensure that the textures we use for these areas are scratch resistant.
We want it to have a similar texture as the one on the top edge of the base. And, as a cherry on top, we want to add embossed numbers to that surface to indicate each angle on the selector.
Finally, we’re also making changes to the small side legs that help stabilize the Defy when in tenting position. I’m sure you can guess what happens if the stabilizing legs aren’t stable themselves 😵💫
The issue is not with the legs but the base design and the mechanism it clips into. The hinge is a bit loose, so the leg wiggles back and forth.

Side note: the side and reverse tenting legs will also be black; this ugly cream color is just for the manufacturing sample.
Plus, it doesn’t snap into position as we’d like, so we’re making changes to the hinge and, to ensure those legs are solid, we’re using a sturdier plastic.
The reverse tilting legs
As you may know by now, the Defy features a reverse tilting solution. Adding this feature was quite a challenge: not only did it have to fit into a base already crowded with electronics and batteries, but it should also work in combination with the tenting legs. It’s like putting together a puzzle of a white bear in a snowstorm 🐻❄️❄️
The development story of that reverse tilting will be the subject of another update, but now we can focus on the improvements we need to make on the first samples we have received.
The main issue with the reverse tilting solution is the user experience. Once it’s set up, it’s perfectly stable, but pulling the legs out is not as satisfying as we’d like, especially the small one.

The problem is that when you try to pull the small leg out, the big one comes with it, and it shouldn’t. We’ll adjust the hinge so you need more force to pull it out. That way, the larger leg will stay put when you pull the smaller one.
Otherwise, they snap into place in a very satisfying way 🥰
What comes next
And that’s all for today!
In the next update, we’ll talk about electronics and firmware, where we have a lot to unravel, and we also want to show you the travel case and maybe even do a sound test soon, so stay tuned for that!
Arrivederci! 🇮🇹
