In the last few days, we have been working closely with our manufacturers in China, creating the Golden Prototype.
The video below is a compilation of the developments that have happened since day 1 until the first validation session.
Explained by our Product Manager, Manel Senís.
Vlog # 1 - The essential components
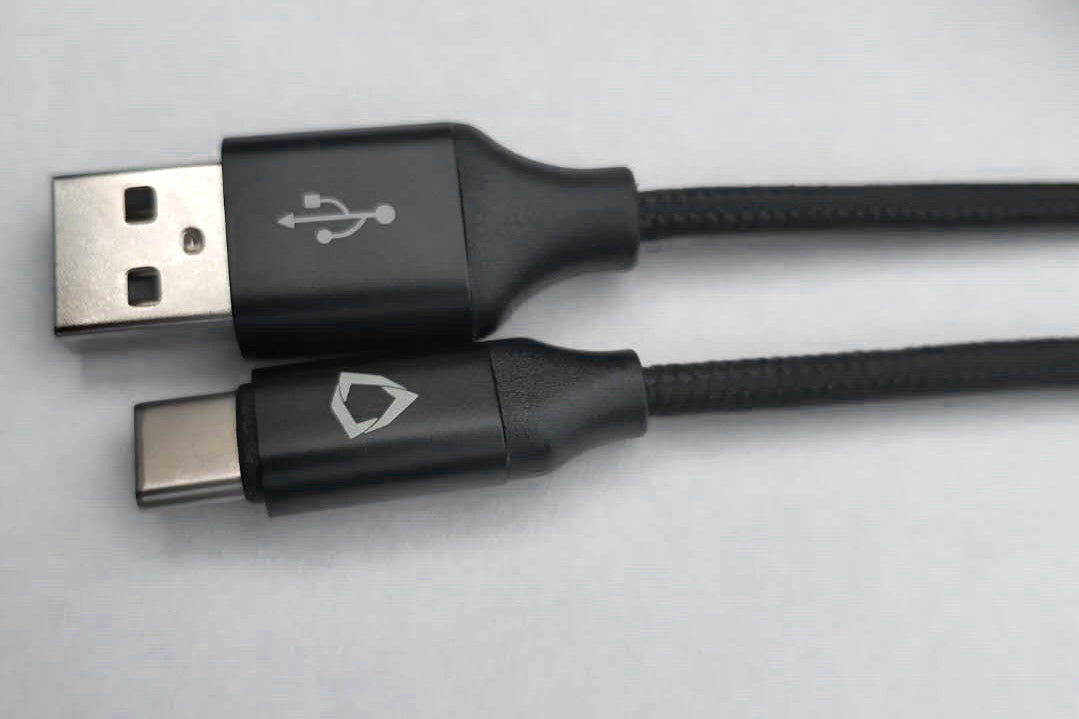
We have already finalised the design of the cables, this includes the right braiding and the right aluminium finishing for the connector.

Cable with logo
The only thing we need to decide now is whether or not there'll be a logo on the cable. We don’t want to have our logo in every component as we already have them in the keycaps, the palm pads, and also the Huble.
So for the Golden Prototype of the cable, we decided to put the logo only on one side. When we receive it, we will check, compare, and share it with all of you, and decide if it’s necessary to have a logo or not.
Another component is the palm pads. This is the only component which won’t have a Golden Prototype. This is because the palm pads require an expensive special metal tooling.
As you know, our palm pads have a unique shape which has all its fabric and PU curved in all sides. We want to validate and finalise the thickness, the fabric, and the anti-slipping material, before paying for this metal tooling.
So for the palm pads prototype, we have made it using a tooling the manufacturer already had.

Sample palm pad
It has a different shape from our palm pads but it has the same fabric, the same foam, the same anti-slipping material, and the same artwork as ours. We will receive this piece in a few days and test it. And once we’ve validated everything, we will pay for the metal tooling.
The third component that we’ve already created is the plastic partition cover (the joint piece) that is placed on the side where each half of the keyboards connect.

Joint pieces

Joint as partition cover
This piece is used as a cover to prevent the light escaping from inside. It will be 3D printed then painted.
We have also received photographs of the special keycaps.
As you know we have 8 special keycaps for the thumbkeys. They are not off-the-shelf keycaps so we need to make them ourselves. They will be 3D printed in translucent material, painted, and then lasered to allow backlight.

Special keycaps 3D-printed
Vlog # 2 - Everything’s going as planned
We’ve already received videos of the plastic translucent part of the Huble, which is made by CNC.

CNC process of one part of the Huble
This part will be painted in black PU color. The aluminium part is yet to be made.
We also have the top panel of the Raise. This part will be made in aluminium. It will be sandblasted, brushed, and anodized.

CNC pieces of the top panel
The manufacturers already made the CNC piece, but we still need to do the other processes.

Milling the left base
We have confirmed the left side. Our next step is to mill the right side.
For the keycap and switch puller, we are using an off-the-shelf piece but we are putting our logo and injecting it in 2 colours: dark grey and white.

Keycap-switch puller
As for the PCBs, we’ve already received the bare PCBs and have ordered all the components.

Bare PCBs
The next step is to do the PCBA, where all the components will be assembled onto the PCB. By then, we will flash our firmware onto the PCBs to check if everything works; most especially the lights, so we can test the base with the proper PCBs.
Vlog # 3 - Huble might need a rework
We’ve received photos of the aluminium case of the Raise. It has already been sandblasted, brushed, and anodized.

Aluminium top case
The Huble’s aluminium part has also been made. Its plastic translucent part has been painted in black PU color.

Huble aluminium top case

Plastic translucent part painted in black
However, there were a few minor problems that we found when fitting of the aluminium case to the plastic part.
This problem is due to the adjustment of the stamping pieces. The factory is working on this right now.

Huble needs to be reworked
We have also tested fitting the base to the top aluminium case. Everything looks good!

Top panel attached to the base
Other components that have been made are the metal pins for the joint. These pins are stainless steel CNC pieces. This is the first time we’ve received these pieces, so will do some tests, then decide modifications.

Stainless steel metal pins
We also have news about the PCBs!
We received the PCBAs. These are the bare PCBs with all the components assembled. To be validate it, we would need to flash the firmware, check if it works and fits well together with the top panel and the base.

PCBA
We have also received photos of the first Mylar sample.
This is the PC sticker that is underneath the keyboard used to cover and protect the base.


Mylar underneath the base
The special keycaps have also been painted and laser-etched with the artwork.

Four out of the eight special keycaps
Vlog # 4 - First validation session: Good news and bad news
We had the first validation session of the Golden Prototype in our assembly factory in China. We had a video conference with our consultants and had the full Golden Prototype assembled, and checked everything.
There are some good news but also some bad news.
For the good news, the base, the top, the screws, and the mylar fit exactly how they should. The screws aren’t colliding with anything and the final block is solid.

The switches fit properly in all the holes. The PCB and all its components also fit well with everything.

Switches and PCBs fitting properly

ISO layout - Spanish keycaps
More good news is that our custom keycap set looks great!
For this Golden Prototype we are creating an ISO layout with Spanish keycaps. In the next Golden Prototype, we will create a silver Raise with ANSI layout.
As for the bad news, our supplier made a mistake with the dimensions of the metal pins. Instead of creating it at 3.5 mm, they made it 4.0 mm. The difference is just 0.5 mm but this is a huge problem because it doesn’t fit properly with the joint piece (the partition cover). Because of this, we can’t test the joint or the attachment of the two halves of the keyboard.

Metal pins with the plastic partition cover
The solution for this is to repeat these pieces. We are going to modify the sides of the metal pins. The manufacturers are working on this right now.
Another bad news is that when we flashed the firmware to the PCBs, it did not work properly, especially the lights. And we needed the lights to validate the base.
Clearly we are disappointed with this because this isn’t an electronics problem. The PCBs for this Golden Prototype is not factory-made but hand-made, so this more of an execution problem.
We have 2 solutions. The first one is for the manufacturers to check the PCB again given all our drawings and specifications and find the problem and fix it. But they have also sent us a set of PCBs.
So the second solution is for Matt, our CTO, to take a look at it and fix it. If they can’t fix it, we definitely will.

Matt, our awesome CTO
Another small problem is that the small rubber legs underneath the keyboard were not properly cut. During mass production, these rubber legs will be cut using a dye cut. But for the Golden Prototype, they did it by hand and it wasn’t good enough. So they have to repeat this.
Given all these issues, we need to repeat the session.
We are going to do a session as soon as possible where they would have fixed all the problems. And then we would need to validate the Golden Prototype again.
We are quite disappointed as we would’ve really wanted to have validated everything in this session but it hasn’t been possible. We can validate majority of the things, but not all of them.
The only thing we can do now is to fix all the problems and do another session as soon as we can.
It has been a very busy last couple of weeks for us but we will update you as soon as possible on the next session.
Thank you for your time reading this update. We will continue to do our best to make this product reach and hopefully surpass all of your expectations.


