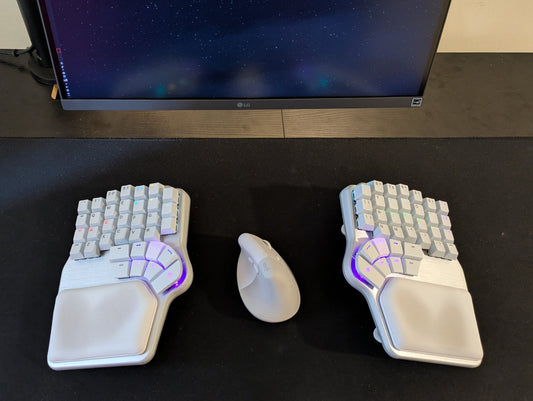
These are the new wooden palm pads for our keyboards.
At first glance, they look like a simple piece of wood. But it actually takes 15 different manufacturing steps to make them.
It sounds a little ridiculous, but making something look simple isn't necessarily simple.
And before choosing the wood, machining it, sanding it, or applying the finish, there was an even more basic question to answer: should the palm pads be made of wood at all?
Why make wooden palm pads?
For the last decade, we've been refining the palm pads used on our keyboards.
Our current soft palm pads are made from multiple layers of foam and silicone, covered with synthetic leather for comfort. They also include a rigid base with magnets, making them extremely easy to attach and remove.

So why make a wooden version?
Because ergonomics isn't one-size-fits-all. We love our soft palm pads, but some people prefer a solid palm rest.

Wood works particularly well for that. It's firm, smooth, and warm to the touch, unlike the cold feeling of brushed aluminum or the harder surface of bare plastic.

Once that decision was made, the next challenge was choosing the right wood.

Choosing the wood
We looked at dozens of different woods and finishes before narrowing the options down to three: Maple, Rosewood, and Walnut.
Maple worked particularly well with the silver keyboards, while walnut complemented the black versions.

Rosewood was also beautiful, but its naturally reddish tone was a little stronger than what we wanted.

We also tested different shades of stain and eventually settled on a medium tone: dark enough to achieve the desired look, but light enough to keep the natural wood grain visible.

Designing something that looks simple
Once the material was chosen, the palm pad still had to be designed.
You can't simply go to a factory and say, "Make a palm pad out of this wood." The manufacturer needs detailed specifications covering dimensions, geometry, tolerances, machining, and finishing.

Our first approach was relatively simple: make a wooden top that could be attached to the same rigid bases used for our existing silicone palm pads.
That would have made manufacturing easier, hidden the magnets inside the base, and helped control the wood's natural expansion and contraction.

But it didn't work as intended.
The plastic base made the result look less clean and limited customization.

Someone might want to use maple with a black keyboard or walnut with a silver one.

So, as tends to happen with us, the palm pads became slightly overengineered.
Hiding everything inside the wood
Instead of relying on a plastic base, we added recesses directly into the wood for both the magnets and the anti-slip rubber.

This required significantly more CNC machining and made the production process more complicated, but it solved several problems at once.
The result has a cleaner appearance; the different wood finishes can be combined freely with silver or black keyboards, and the wood can naturally expand and contract while the magnets continue holding the palm pads securely in place.

The height also needed to be adjusted.
Our soft palm pads compress slightly under the weight of the hands. Wood doesn't, so the wooden version had to be made slightly lower to compensate.

Once the design was finalized, it was time to turn it into a real product.
And that's where the 15-step manufacturing process begins.
Step 1: Selecting and inspecting the wood
The process starts by selecting the right pieces of wood.
But this isn't simply a matter of choosing maple or walnut. The factory also checks moisture content, grain, and color consistency to ensure the material matches our approved samples.
Natural wood varies from piece to piece, so this first inspection is essential for maintaining a consistent final product.
Step 2: Cutting the wood
Once the wood has been approved, the planks are cut into smaller pieces.

At this stage, a little extra material is intentionally left around each piece to allow sufficient clearance for subsequent machining operations.
Step 3: CNC machining the recesses
The pieces then go into a CNC machine.
This is where the recesses for the magnets and anti-slip rubber are carved into the bottom of each palm pad.

Integrating these components directly into the wood is one reason the manufacturing process is significantly more involved than simply cutting out a piece of wood.

Step 4: Cutting the final dimensions
After the internal recesses have been machined, the pieces are trimmed to their final dimensions.
At this stage, however, the edges are still straight. And that's not the final shape we wanted.

Step 5: Rounding the edges
The palm pads are moved to another CNC router, which carefully rounds all of the edges.
This creates a softer shape for the finished product and makes the wooden surface more comfortable to the touch.

At this point, you might think the palm pads are almost finished.
Not even close.
Step 6: The first sanding
Next comes sanding. And there's a lot of sanding.

Every surface and edge is carefully sanded to remove machining marks and imperfections, creating a smooth finish.
Because the palm pads are constantly in contact with the hands, achieving the right feel is particularly important.
Step 7: Cleaning the surface
Before any finish can be applied, all dust and residue created during sanding must be removed.
Even small particles left on the surface could affect the consistency of the following coats.
Step 8: First coat of primer
Once the wood is completely clean, the first primer coat is applied.

This begins preparing the surface for the final finish and helps create a more uniform result.
Step 9: Sanding. Again
Step 10: Second coat of primer
Step 11: More. Sanding
And, yes, there's more sanding.
This repeated cycle of coating and sanding is what makes it possible to achieve a smooth, even finish rather than simply covering the wood with a single thick layer.
Step 12: Matching the color
Getting the right walnut or maple tone isn't simply a matter of applying the same finish to every piece.
Wood is a natural material, so its color and grain vary.
Every palm pad must match our approved color sample, and the two palm pads in each set must look like they belong together.

The factory checks them under controlled lighting and makes adjustments where necessary to maintain consistency.
Step 13: Applying the protective top coat
Once the color looks right, the palm pads receive their final protective top coat.
This protects the wood and also creates the final surface finish we wanted.

Step 14: Final quality inspection
Each palm pad then undergoes a final quality inspection.
The factory checks the dimensions, appearance, finish, and fit to make sure everything matches the approved specifications.
Only the palm pads that pass this inspection move on to the final step.

Step 15: Packaging
Finally, the finished palm pads are carefully packaged to protect them during shipping.
Fifteen steps later, that seemingly simple piece of wood is finally ready.

Was all that effort worth it?
Fifteen manufacturing steps, a little overengineering, and a lot more sanding than initially expected.
But we're really happy with the result.

Paired with our dye-sub PBT keycaps, the wooden palm pads give the Dygma Defy a completely different style and feel.

They also look great with the Dygma Sonsei.

And while we still love our soft palm pads, having different options is part of the point.
Would you choose wooden palm pads or stick with the soft ones?
Join the discussion on Reddit or Discord and share your thoughts.
See you there 💜