Whether you use Da Vinci for pleasure or profession, editing videos can sometimes be a painstaking process. I think we can all agree that saving time while working more efficiently would be the ultimate goal.
This might lead you to purchase a keyboard or a control panel designed specifically for Da Vinci Resolve editing.
There are some hefty advantages to these devices, making lighter work of those video edits, while also making you feel as if you're flying some sort of spaceship.
However these "spaceships" have their fair share of disadvantages. They can be clunky, complicated, unergonomic, and often limited to Da Vinci only.

But, if you like to take mini breaks during video edits to reply to emails, surf the web, or catch up on some casual DOTA? This leaves the option of using only a regular keyboard to edit your videos.
With game commands varying from program to program, along with a dire need for more shortcuts; using a regular keyboard can start to feel like a bit of a drag.
The Dygma Raise or Dygma Defy is always an option, but as a matter of fact, any programmable keyboard will do the trick! The secret to increasing your productivity is all in the layers.

Split programmable keyboards come with the ability to add numerous layers that can be switched at the tap of a key. Essentially, you'll the ability to build your own Da Vinci Resolve control panel.
Aside from having your very own Da Vinci control panel, you can program up to 10 layers into your Raise or Defy, complete with LEDs under each key for easy classification.

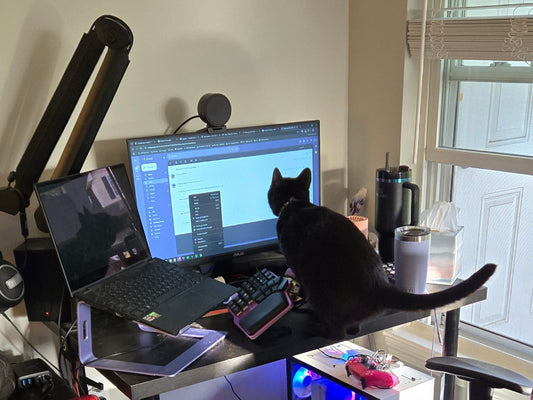
To show some Da Vinci-based layers in action, the man behind the magic here at Dygma Studios, David Moreno has given us access to his:
As you can see, he switched from a regular typing keyboard to his Da Vinci layers setup and removed the right half of the Dygma Raise as he won't be needing it.
Maximizing this side and programming the keys to have all the functions needed for editing means his right hand can simply be used for his mouse. No longer needing to switch from mouse to keyboard to mouse to keyboard.

He has color-coded each key for function recognition:
-
Purple keys have the same functions as a regular keyboard. Escape here, Tab, and then Left Command because he is using a Mac.
-
Pink keys at the top are CTRL left and right, and with these, allowing him to quickly switch between each desktop.
-
For the Green keys he has moved the N and CMD+M, which are found on the right side of the keyboard, to here. They allow him to easily access the Magnet and Link functions when using Da Vinci.
Moving onto the bulk color of his layer setup, the Red keys.
Starting at the very bottom of his keyboard, with the underrow thumb keys. They allow him to easily zoom in and zoom out when using the mouse. While the left underrow thumb key allows him to easily scroll from left to right.

Above these keys, usually where a standard spacebar would be, he has the Command B and Command Z keys. Nice and simple, one key allowed him to cut, and the other key allowed him to undo.
Then he has the Command C to copy and Command V to paste. Standard, basic-bitch business, at the tap of a single key.
He also has ALT+V there to paste the clip attributes to another clip. And this led him to the ENTER key in light blue that he had there, which he pressed with his pinky to apply the settings.

Then, moving on up, he had the F, D, and A keys. They were in the same position as a regular keyboard because he was already used to them.
The F key takes him to the original RAW file, allowing him to check the selection and the D key mutes a clip once selected. The A key is the regular selection tool.
Above these keys, nearer the top of his Dygma Raise, he has the T key, which was his trimming T.
Then he had the Command R key, which gave him the speed selection of the clips being edited.Finally, he has the R key, which allowed him to change the speed or invert a clip with a handy little popup.

Then he moves the I and O keys there, colored them white. These represent the Input and Output functions of Da Vinci. He can take a portion of a clip using these keys in 2 simple clicks.
The lone Dark Blue key in the center of his keyboard half is his delete key. It can delete clips and empty spaces, just like that! Last but not least, his Shift key right at the very top allowed him to select everything.
David has fully utilized the majority of his keys, enabling him to work without his hand ever leaving the keyboard.
His goal for the future is to move the alpha keys on the right side there to the left so he can eventually type just by using the left half of the keyboard. The same way as he did with the right.

At Dygma, we're focused primarily on ergonomics, but increased functional ergonomics is possible with these kinds of tricks and hacks a programmable keyboard isn't just for increasing efficiency on Da Vinci Resolve!
With up to 10 programmable layers, you can build your own personal control panel for all the programs that you use the most, allowing your programmable keyboard to be an all-in-one setup gives you the power to make it adapt to you.
If you are interested in diving into the possible layers of another well-known program check out this video:
Thanks for watching, and in the wise words of Obi-Wan Kenobi, to infinity, and beyond!