It’s important that you clean your keyboard from time to time. At least if you don’t want an ugly surprise when changing your switches. So today, we’re going to explain to clean a hot-swappable keyboard in a few easy steps.
What you’ll need 🧺
- Cleaning products. Window cleaner, Isopropyl alcohol, cleaning vinegar, dish soap, or even water will do the trick.
- A cloth. A kitchen towel is ideal, but paper towels will work just fine. Avoid microfiber cloths because they might leave some bits behind.
- Something to remove dust, like a brush, or the crap remover included in our enhancement kit. You can also use compressed air, but don't spray it on or near the palm pads, as it can affect the silicone inside if there's a gap in the vegan leather. We recommend setting the palm pads aside if you use compressed air for the keyboard.
- Some tools to disassemble the keyboard. Basically, a keycap and switch puller and a Philips screwdriver.
- And some Dygma Bowls for your keycaps and switches.

But first, a few considerations:
Much like Gremlins, keyboards can’t get wet. Why? Because the electronic components could rust or malfunction. So logically, always unplug the keyboard to clean it! No power means less risk if something goes wrong ☠️
Remember never to pour or spray cleaning products directly onto the keyboard. Use the cloth as the middleman.
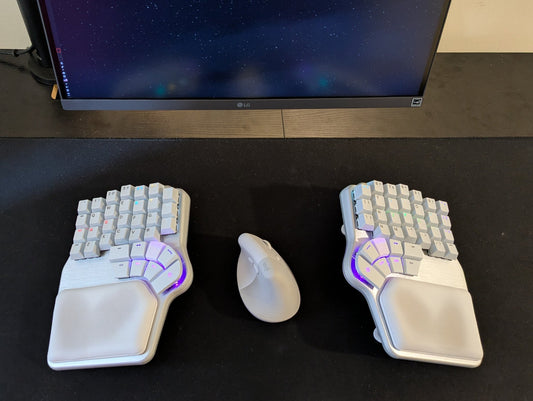
And last but not least, please don’t eat on top of your keyboard. And if you must, use a split keyboard like the Dygma Raise.

Ok, let’s get cleaning 🧽
Start by removing the keycaps.

To clean them, you have two options.
-
You can clean all the surfaces with a cloth dampened with the cleaning product of your choice. Yes, that means the sides too.
-
You can also soak them in warm soapy water for about 30 minutes, scrub them a bit with your hands, rinse them and dry them with a dry cloth. Place them on the table until they’re completely dry 🌬️

Quick-tip: if, after cleaning each keycap, you place it on the table in the same way they are laid out on the keyboard, it’ll be easier to assemble back.
While the keycaps dry, it’s time to clean the body.
Ideally, you would use compressed air at this point. But since you might not be so prepared, here’s another method: Flip the keyboard and gently tap the back.
Remember, if you use compressed air, don't spray it on or near the palm pads, as it can affect the silicone inside if there's a gap in the vegan leather. We recommend setting the palm pads aside if you use compressed air for the keyboard.

Remove any dust left on the keyboard with the help of the crap remover, a brush, or a dry cloth.

If your keyboard has palm pads, gently wipe them with a damp cloth. Be extra careful that no liquids reach the electronics! 💦
The Dygma Raise has detachable palm pads, which makes it much easier. Watch this video if you want to give them a thorough clean.
At this point, you can call it a day and start reassembling the keycaps… BUT we believe your keyboard deserves a good spa treatment every once in a while 🛀
To do so, you’ll need to continue disassembling:

- Remove the switches and the stabilizers.
- Then turn to the bottom side and unscrew the small screws.
- Next, lift the bottom plate slowly, but be very careful. Make sure to disconnect the cable that connects the PCBs before completely removing the panel 🔌
- Once you’ve set the top plate aside, it’s time to remove the big PCBs, unscrew and place them in a different container.
Finally, clean the top and bottom panels with a damp cloth and let them dry.
Everything should be dry within 15 minutes. Once it’s dry, put your keyboard back together 🧑🏭
And Tada! A fresh and clean Dygma Raise.


