One common question that we've been getting a lot is about touch typing.
It’s also something that Dmitry from Hardware Canucks talked about in his review of the Dygma Raise.
So we decided to write this article and also make a video on the topic. And who better to explain the benefits of touch typing than Dygma’s CEO, Luis “Deilor” Sevilla.
We will explain the different typing techniques, what touch typing is, why it matters, what you can do to learn it, and once you’ve learned it, what else you can do to optimize your typing.
Now to the questions at hand.
What is touch typing and why is it important?
Short answer, touch typing is a technique that helps you type faster and more efficiently by using all your fingers. Typing with this technique is important because it can greatly improve your productivity, especially if you have a type-intensive job, like a programmer or a writer.
In Deilor’s words, everyone learns how to type on a keyboard when they are young by playing video games. That’s why most of us are defaulting to a technique that’s actually called “gamer typing”, where you use 3 fingers on one hand and 2 at most on the other.
But now that we are grown-ups and we have “real jobs” and can’t game all day, we are starting to use the keyboard as a professional tool.
In a way, typing has become an extension of our thinking and it’s very difficult to develop our thoughts without actually putting them on paper and reflecting on them.
So if you are able to type faster, then you can develop your thoughts faster and this impacts your creative process. Typing fast enables you to create faster. It’s a matter of both raw speed and keeping up with your thoughts.
Let’s say you type 2 hours a day and you are a slow typist averaging 50 words per minute. If you increase your typing speed to 100 words per minute (which isn’t hard to achieve) then what you were doing for 2 hours, now you’re achieving in just 1.
The important concept here is cognitive friction. When you have to make a mental effort to transfer your thoughts into text because you keep looking at the keyboard, you won't be able to produce as much as you want given a certain time. But if you can reduce that friction, you will be able to and will be fast enough.
With that being said, what exactly is touch typing?
Touch typing is a technique that creates a structure where you have to place different fingers on specific areas on your keyboard.
You are using all your 10 fingers, and each one is in charge of a section or a column on the keyboard. And it all starts with the Home Row.
Did you ever wonder why there are little bumps on “F” and “J” keys? That’s for you to figure out if your index fingers are on the home row or not.

Starting from the home row, every finger is assigned a section on the keyboard, like in the image below.

This technique was initially learned when typewriters were a thing and it still holds true today, even more so with the Raise, but more on that later.
Common mistakes when touch typing
There are some mistakes that people are doing when learning how to touch type and we’ll go briefly through the most popular ones.
The most common one is crossing your fingers on the letters “Y” and “B”. For the “Y”, you should always use the right-hand index finger, but some people are used to pressing it with the other index.
The same thing happens with “B” where you are supposed to press it with your left-hand index finger but it’s commonly pressed with your right index.
The second most common mistake when learning how to touch type is using the wrong side modifiers.
If for example, you want to press “Shift” + “A”, you should use the right-hand shift, instead of the left one.
The reason you should learn to use the modifiers on both sides appropriately becomes more obvious when you have to press more complex strings of keys, like “Ctrl” + “Alt” + “A”. If you were to press all the keys on your left side, you will force your hand in a weird position that will slow you down. In this case, you should use “Ctrl” and “Alt” from the right side of the keyboard and press A with your left.
How to learn to touch type
Now that we learned what touch typing is, let’s move on to how to actually develop this skill.
First of all, if you don’t know how to touch type, then you are probably from one of two categories.
Either you type with just one finger on each hand, which.. yikes, what are you doing, or you developed that “gamer typing” which we talked about earlier.
Some may wonder, especially gamers, if they will lose their default typing technique when they learn how to touch type. The answer is simple, no.
Just like you don’t forget how to run after you learn how to ride a bicycle.
You can still type like you normally do, and then allocate around 5 minutes each day to practice touch typing. This is actually one of the best ways to learn the technique. There are multiple websites with exercises and games for you to practice.
So you are not replacing your old typing habit, you just develop a new, better one, to use when necessary.
The most important thing in your learning process is to learn the technique first, and let the speed come naturally afterward. If you are rushing through it, it won’t work. Take your time and do it properly.
Based on our own experience, it takes about a month of practicing 5 minutes a day, to get the speed of your touch typing to be on par with your default typing.
Maybe the hardest part of learning how to touch type is the “wooden hand” effect and this is because we are not used to typing with all our fingers from the right hand.
Since our right ring and pinky fingers usually rest on the mouse and don’t do much, when you start using them actively, you will get a slight sore. This is normal and it will go away after some practice.
So you practiced every day, your technique got better, and now you are the fastest typist in the west. Where do you go from here?
Now it’s time to unlock the full potential of the Dygma Raise.
Optimizing your touch typing skills
On a normal keyboard, once you mastered touch typing, that’s kinda it, you have nothing else to optimize. On the Dygma Raise keyboard, however, this is when the fun starts.
There is something called high-frequency keys which is a fancy word for keys you press often. Those can be as standard as 'Enter', 'Backspace', 'Esc' but depending on your job, they can also be 'Home', 'End', 'Page up', 'Page Down' or other keys that are usually placed in awkward positions far away from your Home Row.
With the Raise, you can configure the additional thumb buttons into high-frequency keys and you will never have to move your hands away from their natural position ever again.
We are actually developing a process to help our community identify their own high-frequency keys and figure out where is the best way to place them.
So now you touch type like a madman and have configured your thumb keys to make the most out of the Raise, now what?
Use your keyboard split!
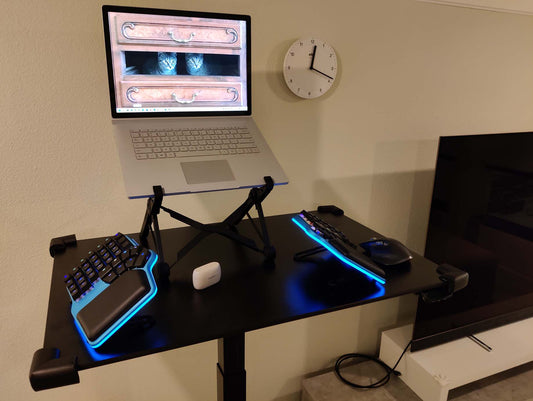
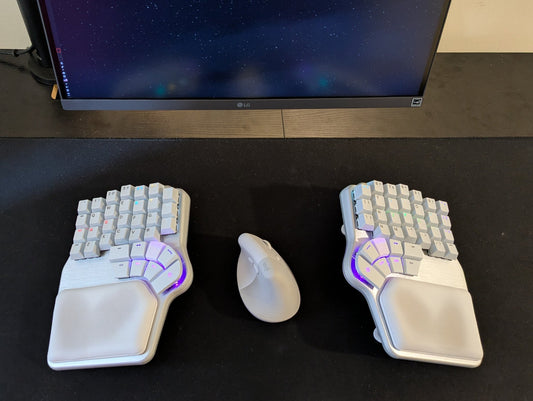
Remember how the Raise splits? It’s time to take ergonomics to the next level and split your keyboard shoulder-width apart.

Look at you now, back straight, looking forward, keyboard sides shoulder-width apart, being efficient and comfortable. That’s the power of the Raise. And that's the power of touch typing!
We actually did a video on improving productivity with the Raise and we encourage you to take a look at it.
Make sure to also check the full video of this article on our Youtube channel.
Thank you for staying with us and we hope this piece of content was helpful!


